
It was not so long ago that we entered the modern era of firearms. For several hundred years, man relied on single shots of various design and with rudimentary ignition systems. Sometime around the early 1800’s inventors redesigned the wheel and attached a barrel on the end of one side. A decade or so later and the cap and ball revolver made a debut in the form of the Colt Patterson, one of the first to be offered in sufficient commercial quantities. As war brewed between the states Sam Colt introduced a series of revolvers which utilized the latest in metallurgy, combining art with deadly effectiveness.
Since backing out of getting into cap and ball revolvers earlier I felt the need to revisit the topic. Whereas one supply of black powder dried up, another opened. Caps appeared, previously out of stock items became available, it just came together. So why the ’61 Navy in 36 caliber? Why not the iconic ’51? Because it’s been done to death. I actually wanted to review a ’62 Police or the ’49 Wells Fargo but felt my first steps should be with a less known classic.
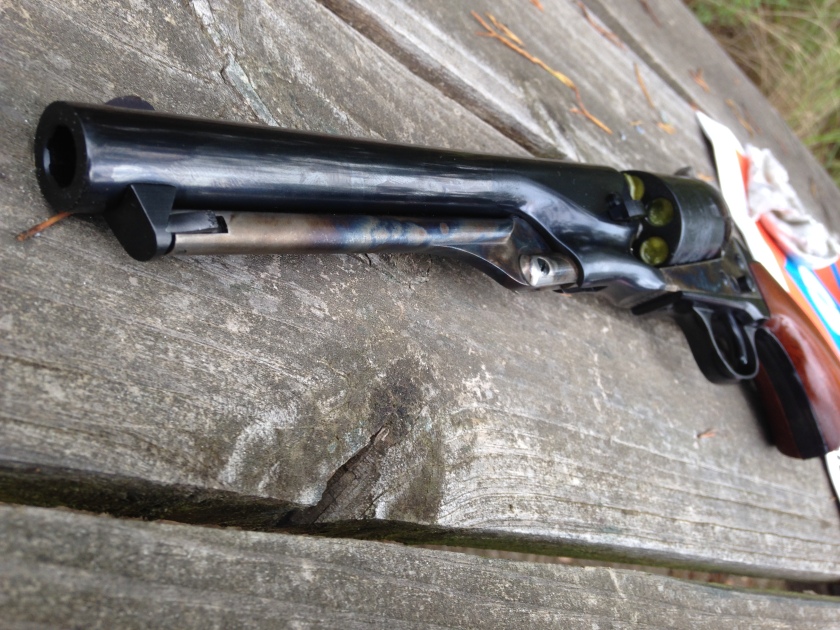
Once I had the model picked I chose to order from Taylor’s and Co. There’s a ~$25 premium versus other vendors but my SAA clone is from them and its tops. It arrived in the mail a few days later and once again, the extra cost was not regrettable. My ’61 sports a steel frame with standard Uberti English walnut grip. The frame and rammer are finished in the case color style, while the 7.5” barrel, wedge, and cylinder come in standard blue. Also present on the cylinder is the engraved Battle of Campeche scene. My model has cutouts in the frame to accept a shoulder stock. I think this is more of a homage to historical accuracy as I’ve yet to see an aftermarket stock for something like this. The cylinder is six shots and is meant to be loaded with six. Pins between the chambers fit a recessed portion of the hammer, keeping it secure from negligent discharge. My revolver uses a .375” round ball and functions best with a Remington #10 cap; more on that later.
Field stripping the revolver is a simple yet tedious matter of dropping the hammer to half-cock, tapping out the wedge, aligning the rammer on a chamber wall (between any two chambers), and giving firm taps with a rubber mallet. My pistol is very tight in regards to arbor and barrel assembly, which necessitates the use of a mallet. Assembly is no different except in reverse with one catch, my pistol requires tapping the muzzle with the mallet in order to bring the arbor fully seated in the barrel assembly. I hate hammering the crown on any barrel, but it has yet to damage anything.
My first time out with the pistol went without a hitch. Just about everything I had heard regarding cap and ball revolvers – not true. Out of 60 or so balls I had one cap jam. And it was induced by an oversized cap that was not squeezed to fit. Also, my revolver did not suck caps. A lot has been said on the issue of cap sucking, the unfortunate event of back pressure upon firing causing the hammer to grab a spent cap from the nipple and lodge it in the firing mechanism, thereby jamming the gun. There was enough cap sucking horror stories on the ’62 to make me think twice of that model. Finally, my revolver did not shoot high. It did not shoot low, or to the side. It shot point of aim. In fact, it shot so well I moved from basic function testing to groups. I walked off 18 paces and loaded up three balls over 15 grains of Goex fff black powder.
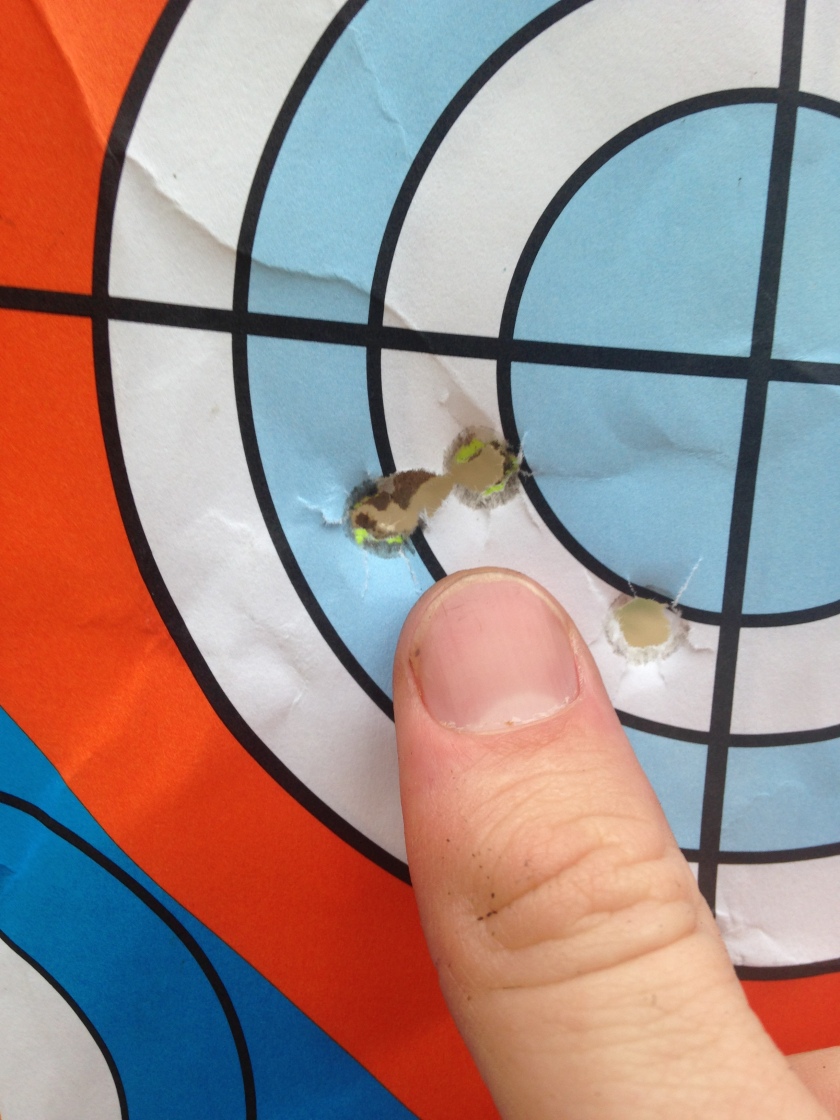
I ended up not doing load testing. 15 grains just works. It’s the recommended starting load for 36 caliber. I did play around with 22 grains toward the end of the evaluation. It produces a little more smoke and noticeably more recoil, but kills my steel target no faster. I used Hornady .375” balls exclusively for the review. Each ball left a ring of lead when rammed so fit in the chamber was snug. I initially used Thompsons Center Arm’s Bore Butter to lube each chamber but stopped application after the third cylinder. It fast becomes a greasy mess in hot weather, leeching its way out of the chambers and into the hand. I recommend lightly lubing a cylinder-full every fourth for fifth cylinder to keep fouling to an acceptable minimum.

While lubing the chambers isn’t a bad idea, warm weather can make it difficult.
About the only thing that didn’t go as planned were the caps. I was able to chance into some Remington #10s, and those are definitely the ones you want for this pistol. Unfortunately, I was only able to get one tin. I tried some CCI #11’s and they work as long as I pinch the sides before inserting on a nipple. MY first cap jam involved a CCI #11 that was purposefully not pinched. Next are the widely available yet too small CCI #10’s. Slightly smaller in length than the Remington #10’s, these caps are not only the most difficult to maneuver on the nipple but they fail to fire half the time. The CCI’s short length inhibits a flush seat over the nipple. I often had to strike a cap twice; once to seat and another to fire. Perhaps they would work on a smaller revolver but for the ’61 Navy they just don’t cut it.
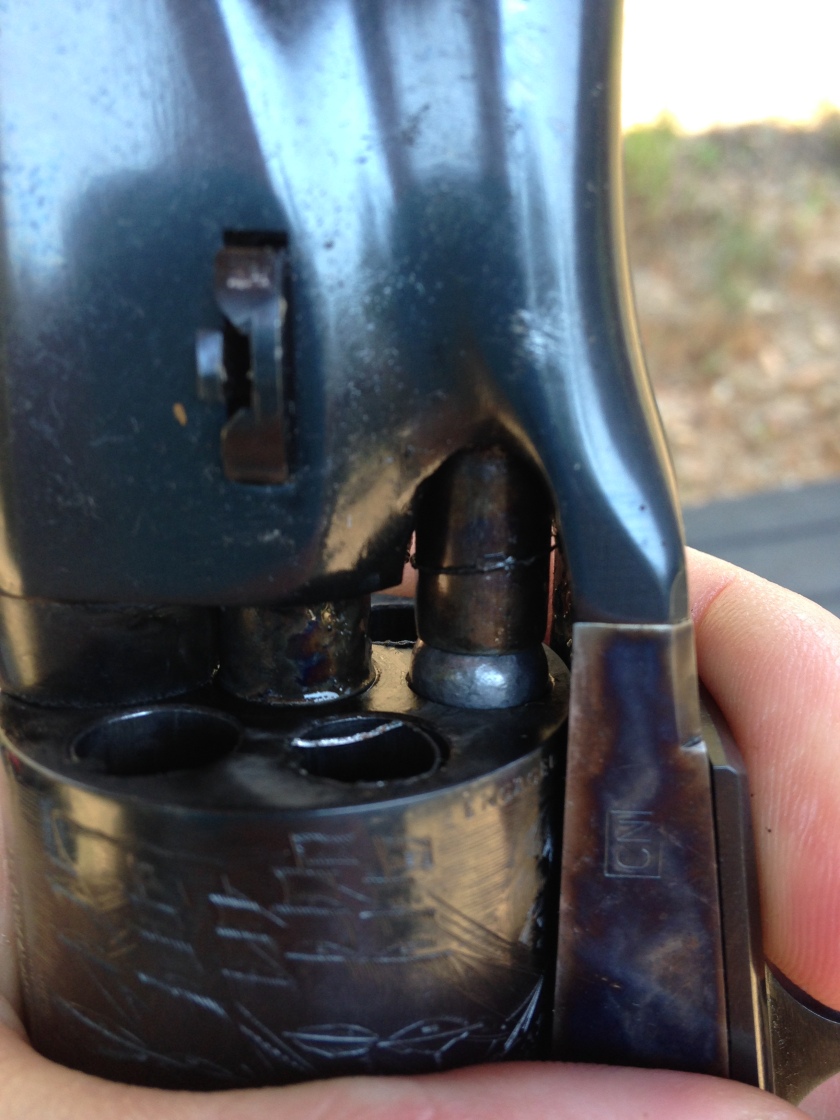
Seating a Hornady .375″ ball over 15 grains of Goex fff. A ring of lead in the adjacent chamber shows good fit, and can help protect against chain fires.
The durability of this revolver is better felt than read. It’s a solid chunk of steel. This isn’t the gun you’re going to slip in your waist band and forget about. Class and style always cost weight and the ’61 Navy is no exception. Aside from the trigger and cylinder, the only external moving parts on the gun are the rammer and hammer. With a v-cut notch in the hammer acting as the rear sight, I felt this was a weakness in the design that could prove apparent with use. Though I have no intention of wearing out this gun, future play in the hammer could take a toll on accuracy.
Cleanup isn’t that big of a deal once you get used to black powder fouling. It’s not the end all magic corrosion potion you’ve heard about. Yes, it will turn your gun into a pile of rust – but not outright. Just as a reference I usually let 3-4 hours lapse between shooting and cleaning with no ill effects. I will caution you on the nipples. I bought a nipple wrench to disassemble when I first received the revolver for an initial cleaning. I erred in screwing one of the nipples in too tight. Long story short, all but one nipple can be removed from the cylinder now. I would suggest cleaning each nipple before firing but only hand tighten them in the cylinder – do not torque.
This was a revealing review. Identifying quirks and other things like that is interesting, but delving into an historical replica is something else. Messing with black powder, caps, lube, and the like will never be convenient. But neither is shooting period correct guns. With nothing to compare it to I’ll stop short of saying this is the best gun. It did, however, debunk some “internet facts,” let me relive a classic, and put nice groups on paper. That works for me.

Use hammer pressure to fully seat tight caps onto a nipple. Pointed in a safe direction, of course, in case the hammer slips.
Lube nipples before installation.
Use a lube over chamber mouths to add insurance against a chain-fire, and use a stiffer or softer lube as weather demands. A lube made of beeswax, vaseline, and mineral oil mixed in a microwave run on high in a heat resistant pyrex container for several cycles while sitting between cycles for a few minutes is all you need.
LikeLike